We are now ready to start the actual installation. Navigate to the new root's location.
cd /mnt/gentoo
Now we will retrieve the direct download URL for a Stage 3 tarball in the Downloads section of the Gentoo website. The tarball will be fairly recent and will have its date and time in the file name. Download the tarball using the wget tool:
wget https://distfiles.gentoo.org/releases/amd64/autobuilds/20260719T170103Z/stage3-amd64-desktop-systemd-20260719T170103Z.tar.xz
We will now extract all of the files from the archive using tar:
tar xpvf stage3-*.tar.xz --xattrs-include='*.*' --numeric-owner -C /mnt/gentoo
Now that the files of our base system are extracted, we will configure Portage's compile options a little bit. Open the appropriate file using the nano text editor:
nano /mnt/gentoo/etc/portage/make.conf
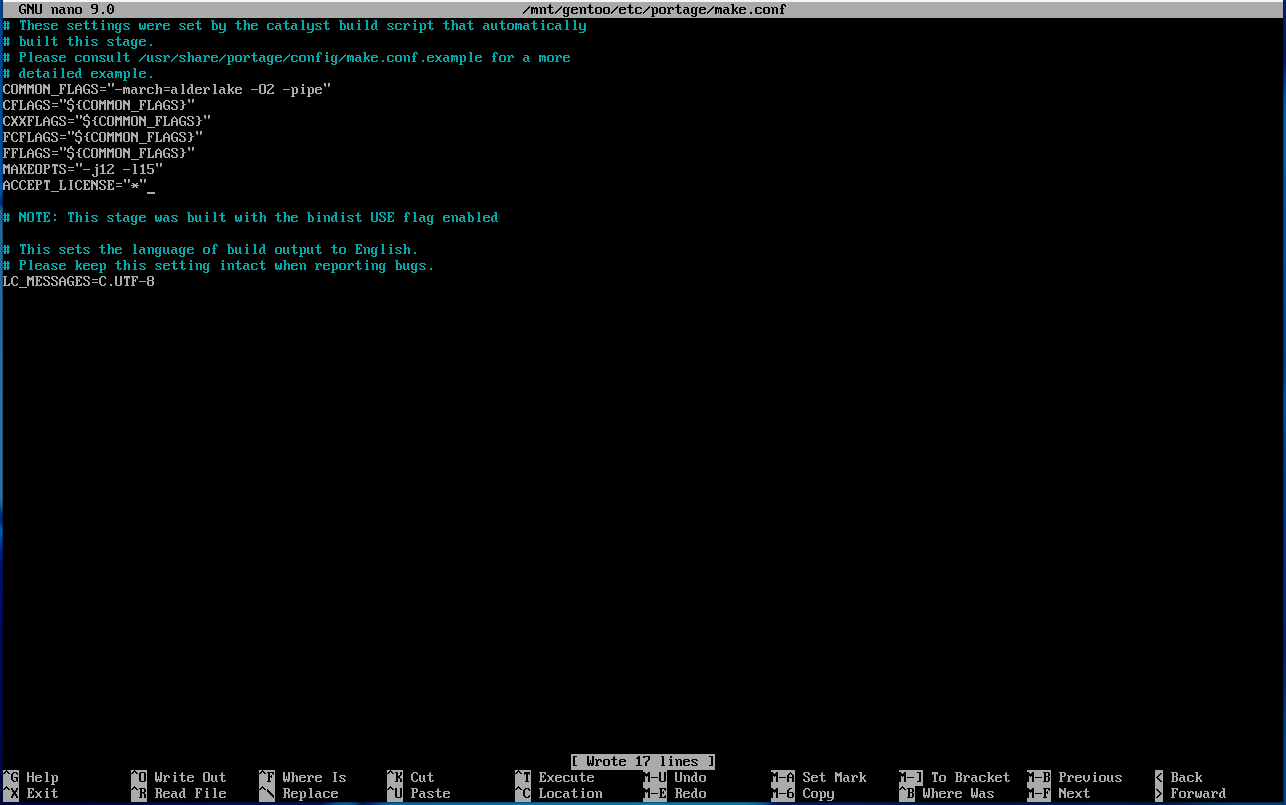
On the "COMMON_FLAGS" line, we will add -march=native in front of the other flags. If a specific parameter for the march flag exists for your CPU, use it instead of native. In my case, it would be -march=alderlake.
Now we will add the MAKEOPTS line, with the -j and -l parameters. Here is what the line should look like:
MAKEOPTS="-j24 -l30"
The -j parameter is the number of threads your CPU has, and the -l parameter must be set slightly above the -j number.
Now we're going to add another line to accept all licenses automatically, in the same file:
ACCEPT_LICENSE="*"
After all of these modifications, we save the file and exit nano. We are now ready to set up the base system. Here is a screenshot of what the make.conf file should look like:
 Next page